I've never decorated for Thanksgiving before, perhaps because I've never hosted a traditional dinner before. But this year, my parents will be visiting, and that motivated me to start thinking about decorations I could easily make with materials I already had. I definitely won't be cooking an elaborate turkey dinner, but we can still be festive! So here's an option for easy DIY place cards. It's all well and good to print them off your computer, but I prefer a handmade touch. And I'm certainly no calligrapher, but I think handwriting makes them nicer too.
What you'll need:
- scraps of colored paper (any paper will do as long as it's not tissue-thin)
- drafting tape, washi tape, or some other removeable tape that won't tear paper
- pen and pencil
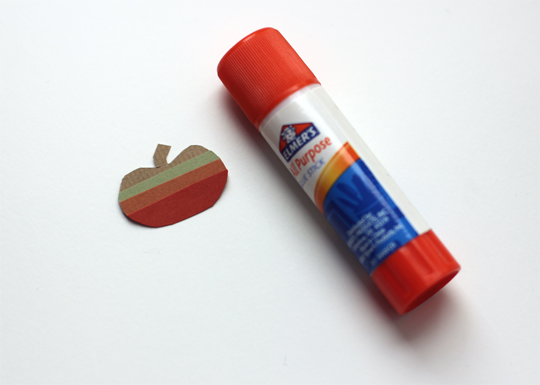
- glue stick
- cardstock (you can make several place cards from one sheet)
- not pictured here: scissors, ruler
Draw Thanksgiving or autumn-themed shapes to use as templates. I quickly drew a couple of leaf shapes and a pumpkin. If you'd like to use my shapes, you can view and
print the pdf here. Also, cut your cardstock to desired place card size (I cut 4" x 4" squares, so when folded the place cards are 2"h x 4"w).
Cut out your templates, and cut your paper into strips. The size will depend on how many colors/stripes you want in your shape. In the example shown here, I ended up using strips that were about 1/4"h, give or take a little, to make four stripes in my pumpkin.
Stack your paper up and temporarily hold in place with drafting or washi tape. Place your template on top and carefully cut out your shape from all layers of paper stacked up.
You can add a bit more tape to hold the template in position while cutting if necessary, but I found the less tape used the better and preferred to just hold my shape in place.
This is what the back should look like (the tape is still securing the front). If you can't see all of your colors, trim as necessary on the back while the tape is still holding the front together. Use a glue stick on the back and position on your place card.
Once your shape is glued down, carefully peel off any tape on the front. Then you can draw a bit more to embellish or just leave the simple shape as is. Use a ruler to draw a line and write your guest's name.
I only managed to get a decent shot of one finished card (see first photo) as I'm still not used to these early sunsets. I frequently forget to take photos until the light is completely gone. But nevertheless, I was able to make several cards with different shapes in a fairly short amount of time.
If I failed to explain any steps clearly or if you have any questions, leave me a comment! I always respond via email. :)
xo, Mary


Super cute! Definitely can us these for my holiday dinner party!
ReplyDeleteThey're adorable! We're not hosting Thanksgiving, but we're having my side of the family here for Christmas. It occurred to me over the weekend that I don't have much for hosting a "real" holiday, so I need to get on the ball! What are you guys cooking for Turkey Day?
ReplyDeleteNeat idea. I like how you used the different colors of scrap paper.
ReplyDeleteWow, absolutely lovely idea!
ReplyDelete;)
Cat kisses.
These are so cute! My family is super informal on thanksgiving, but we do host Christmas, so I'm definitely going to make these!
ReplyDeleteThat's so cute! What a great idea to use the masking tape to keep your shape in tact- ingenious! I hope you have a lovely time hosting your parents!
ReplyDeleteFun idea! And I love that they are made with supplies I have on hand :)
ReplyDeleteOoo, I love that technique. So cute x
ReplyDelete